Showing posts with label blueberries. Show all posts
Monday, July 30, 2012
Blueberry-Peach Crisp
If you follow me on Twitter, you'll know that at the end of last week, our fridge stopped working (and I was tweeting with excessive exclamation points). It just wasn't getting cold; the freezer worked perfectly, the fridge not so much. So while Bo researched ways to fix it, I researched ways to use up ingredients before they went bad. Enter... Blueberry-Peach Crisp! I had fresh blueberries and peaches sitting in my fridge drawer, just waiting to get used in something yummy. I grabbed a stick of butter from the freezer and set to it.
Posted by
Sara
at
9:04 AM
6
comments
Labels:
baking,
berries,
blueberries,
brunch,
dessert,
peaches,
potluck recipe,
sara,
summer
Monday, November 21, 2011
Blue Cranberry Sauce
Poor cranberry sauce is so low on the list when it comes to Thanksgiving Dinner. It's been relegated to a jiggly can-shaped mass that gets picked at out of politeness.
But, not any more! This cranberry sauce is jazzed up with blueberries, cinnamon, cardamom, and vanilla. It sounds a bit crazy, but it definitely brings poor cranberries out of their doldrums. And the color is such a gorgeous addition to your table.
Happy Thanksgiving!
Blue Cranberry Sauce
adapted from Allrecipes
12 oz. fresh cranberries
1 c. water
1 c. sugar
1 tsp. cinnamon
1/4 tsp. nutmeg
1/8 tsp. cardamom
1 tsp. vanilla
1 pint (16 oz.) blueberries
Wash and pick over cranberries. Place in a medium saucepan with water and sugar. Bring to a boil, then reduce heat and simmer for 10 minutes, or until cranberries burst. Slightly mash the cranberries with the back of a wooden spoon to ensure all skins are broken. Add the spices and vanilla and mix well. Remove from heat and mix in the blueberries; don’t be afraid to break a few, but don’t overmash. The sauce will thicken as it cools. Transfer to a bowl, cool slightly, and place plastic wrap directly on the sauce to cover. Serve warm or refrigerate until chilled.
Note: This can be made up to three days ahead of time and stored in the fridge.
Ingredient Lineup:
Posted by
Sara
at
8:00 AM
0
comments
Labels:
blueberries,
cranberries,
fruit,
gluten free,
nondairy,
sara,
Thanksgiving,
vegan,
vegetarian
Wednesday, June 22, 2011
Blueberry Buckle
On Saturday morning, our weather here was blissfully cooler (mind you, it was still in the 80s and humid), so we decided to strap on Rory's backpack and walk to a diner for breakfast. The little diner we were trying out was not 30 feet from our local farmers' market, so we thought we'd grab a few yummy items right after breakfast. It's so fun taking Rory to the market because her little backpack elicits so many "Awww"s and smiles from everyone, and little kids come right up to ask if they can pet her. It's seriously adorable. But, I digress... :)
This last weekend, we grabbed some blueberries from a stand and tucked them into Rory's backpack with green beans, tomatoes, macaroons, and all-natural dog treats. The blueberries sat on my counter for a day before I stumbled on a recipe to try them out - Blueberry Buckle. It's moist cake crammed full of blueberries and topped with a light cinnamon sugar streusel. Also! I sneaked a little tip into the recipe down there: Tossing blueberries in a little flour before adding them to a batter will help keep them from sinking to the bottom while in the oven!
Enjoy!
Blueberry Buckle
adapted from Allrecipes
Cake:
3/4 c. sugar
1/4 c. unsalted butter, softened (or shortening)
1 egg
1 tsp. vanilla
1 1/2 c. flour
2 tsp. baking powder
1/2 tsp. salt
1/2 c. milk
2 c. blueberries
2 Tbsp. flour
Topping:
1/2 c. sugar
1/3 c. flour
1/2 tsp. cinnamon
1/4 c. unsalted butter, softened
Preheat oven to 350 degrees and grease an 8" square baking pan.
Cream together sugar, butter, egg, and vanilla. In a separate bowl, whisk together flour, baking powder, and salt. Add 1/3 of the dry mixture to the butter mixture and beat until combined. Scrape down sides of the bowl, and add 1/2 of the milk. Add another 1/3 of the dry mixture, and repeat until all is combined. Toss blueberries with the 2 Tbsp. flour, and then fold into batter. Pour into prepared pan. In separate bowl, mix together the topping ingredients, until combined and crumbly. Sprinkle over batter. Bake 40 minutes, or until passes the toothpick test. Allow to cool before slicing.
Ingredient Lineup:
Alternate adding dry ingredients and milk.
Fold blueberries into batter.
Sprinkle sugar crumb mixture over top.
Posted by
Sara
at
5:48 AM
0
comments
Labels:
baking,
blueberries,
brunch,
cake,
fruit,
sara,
vegetarian
Thursday, April 7, 2011
Easy Fruit Rollups
Wanna know something that makes zero sense? I have the biggest sweet tooth, but I don't care much for fruit. Strange, huh? Given the choice, I'll gobble down a plate of sauteed green beans or asparagus and pretty much ignore a bowl full of strawberries. I don't know why fruit doesn't appeal to me or even when that happened. I do love a fresh pear or nectarine or peach from the Pacific Northwest (again - I'm so getting kicked out of the state of Georgia). Beyond that, meh.
Anyway, I'm working to get more fruit in my diet. I'm also trying to lower the number of weird ingredients and dyes in the foods I eat. These fruit rollups are a double whammy! They're portable, don't bruise, don't spoil, and contain nothing but real ingredients found in my own kitchen. If you're a die-hard fruit rollup fan, you can press the seeds out with a fine mesh sieve, but I wanted the extra fiber and I didn't want to add an extra step in the process :)
I'll definitely, definitely, definitely be making these again regularly and keeping them on hand. I'm so excited to have found a recipe for an easy, yummy, and healthy snack. Hurrah!
Enjoy!
Anyway, I'm working to get more fruit in my diet. I'm also trying to lower the number of weird ingredients and dyes in the foods I eat. These fruit rollups are a double whammy! They're portable, don't bruise, don't spoil, and contain nothing but real ingredients found in my own kitchen. If you're a die-hard fruit rollup fan, you can press the seeds out with a fine mesh sieve, but I wanted the extra fiber and I didn't want to add an extra step in the process :)
I'll definitely, definitely, definitely be making these again regularly and keeping them on hand. I'm so excited to have found a recipe for an easy, yummy, and healthy snack. Hurrah!
Enjoy!
Easy Fruit Rollups
2 c. pureed fruit*
1 c. unsweetened, natural applesauce
1 Tbsp. lemon juice
sugar (or honey or agave) to taste, approx 1/4 c.
Puree fruit in your food processor until smooth. If desired, press through a sieve to remove seeds. Stir in applesauce, lemon juice, and sugar, until sugar is completely dissolved. Pour into the prepared baking pan, and spread to just shy of the parchment edge, making sure the center isn't thicker than the edges.
Place into oven, propping the door open with a wooden spoon. Bake for 7 hours or until the center is just slightly sticky. Allow to cool and slice with a pizza cutter or kitchen shears. Store in airtight container.
Note: If you're like me and accidentally overbake your fruit and the edges get crisp (while the center is perfect), sprinkle water on the crisp areas. They'll soak up the moisture and become pliable again.
* The amount of fruit it takes to get 2 cups pureed will vary. It took me about 1 1/2lbs of strawberries to yield 2 cups once they were pureed.
Their ingredient lineup:
My ingredient lineup:
Prop open your oven door with a wooden spoon.
Pile O' Fruit Rolls!
It took about 45 seconds for these to find a new home inside my belly :)
Posted by
Sara
at
7:43 AM
2
comments
Labels:
berries,
blueberries,
food revolution,
fruit,
gluten free,
healthy,
jaime oliver,
kids in the kitchen,
lunchbox,
sara,
snack,
vegan,
vegetarian
Monday, August 2, 2010
Davy Baby's Birthday Blueberry Pie
When my husband was a boy, he and his 6 other siblings spent their summers here on Damariscotta Lake. Leaving the heat of Massachusetts behind, he'd spend his days fishing, swimming, boating and berry picking at his family's cabin. Now his Aunt Rose and "Unkie" lived up the road a piece in a white clapboard farm house. They had no children of their own so they loved having these 7 nieces and nephews visit during the dog days of summer. David and his twin brother Peter it seems were favorites. Their birthday fell on July 29th, right smack dab in the middle of berry picking season. So Aunt Rose, who had a berry patch in her back yard, started the tradition of baking each boy their very own pie for their birthday. Peter always had a red raspberry pie and David a blueberry. Since I cannot mess with a tradition that has been embedded in David's life, I've picked up the torch so to say and bake David a pie every year for his birthday instead of a cake.
In a large mixing bowl, combine:
4 cups blueberries (We grow high bush varieties)
1/2 cup sugar
2 tbsp molasses
2 tbsp minute tapioca
1 tsp lemon juice
1 tsp cinnamon
1/2 cup sugar
2 tbsp molasses
2 tbsp minute tapioca
1 tsp lemon juice
1 tsp cinnamon
*
Ingredient's for Norma's Pie Crust
2 cups flour
1 cup shortening (Norma and I both swear by Crisco)
1/2 teaspoon salt
1 egg, beaten
1 tablespoon vinegar
3 tablespoons cold water
*
1.) Mix the flour, shortening, and salt with a pastry blender. Beat together the egg, vinegar and cold water. Add to the flour mixture, mixing well, but do not knead. Divide dough in half. Roll on a floured surface until large enough to fit on a 9-inch pie plate. Carefully place the dough in the pie plate, crimping edges.
2.) Preheat the oven to 375 degrees.
3.) Fill the pie shell with the combined pie filling. Cover the filling with the second pie pastry. Slit the top of the pie for ventilation, and bake in the oven at 375 for 50 minutes. I cover the edges of the pie with aluminum foil, removing it the last 15 minutes of baking time so the crust won't burn. Serve with an all natural vanilla ice cream, we prefer Breyer's, for pie a la mode.
Posted by
Money Saving Maine-iac
at
5:28 AM
3
comments
Labels:
blueberries,
dessert,
pie,
Teresa
Monday, July 19, 2010
Oatmeal Blueberry Cookies
The blueberries are here! We've been picking these like crazy and I thought, since I'm in the throws of preserving them, I would show you the many ways I preserve this harvest. At Money Saving Maine-iac you can check in everyday this week and follow this the series Five Days, Five Different Ways.
These cookies are delicious. There are never any complaints from the Peanut Gallery but I think the next time I bake these I'll try substituting 1/2 cup shortening for 1/2 cup of the butter. I think the texture will be more to my personal liking. This recipe is a definite 4 spoons!
Ingredients:
- ½ pound (2 sticks) butter, softened
- 1 c. firmly packed brown sugar
- ½ c. granulated sugar
- 2 eggs
- 1 tsp. vanilla
- 1½ c. all-purpose flour
- 1 tsp baking soda
- 1 tsp ground cinnamon
- ½ tsp. salt (optional)
- 3 c. oats
- 1½ c. dried blueberries
A neighbor friend Linda C. gave this recipe to me a last year back before moving to Florida. It looks like it is loosely based on the Quaker Oats recipe.
1.) Heat oven to 350 degrees. In large bowl, beat margarine and sugars until creamy. Add eggs and vanilla; beat well.
2.) In a separate bowl, combine flour, baking soda, cinnamon and salt; mix well. Add oats and dried blueberries.
3.) Combine the Dry and wet ingredients.
4.) Drop dough by rounded tablespoonfuls onto parchment lined cookie sheets.
5.) Bake 10 to 12 minutes or until light golden brown.
Blessings,
Posted by
Money Saving Maine-iac
at
7:00 AM
1 comments
Labels:
blueberries,
cookies,
Teresa
Friday, July 16, 2010
Easy Peasy Popsicles
I opted to make a creamy coconutty popsicle because it sounded just so yum. The Limber de Coco recipe ended up tasting like frozen rice pudding - Yum! Because I limit my dairy, I may try making them next time with all coconut milk, or just substituting almond milk for the evaporated milk. I gave this one a 4 Spoons.
The Berry popsicles are yummy and definitely an easy way to get in a ton of fruit. They aren't as sweet as a grocery-store popsicle, so you can add more honey if you like. I rated these a 4 Spoons. I might try making them with strawberries next.
The Prosecco popsicles were a great idea in theory. I think my mistake was in using a Prosecco that I don't absolutely love. I'm pretty sure that if I made them with my favorite Moscato, they'd be to-die-for. Yes, you can still taste the champagne flavor when you pull them out of the freezer. So, if you love champagne, these could be fun. I rated these a 3.5 Spoons (probably a 4 Spoons with my Moscato).
My popsicle mold is a cheapy from Ikea. But I've seen them at craft stores, too. Here's a link for snazzy ones onlines. I'm seriously tempted to order them. I'd be the coolest non-mom on the block, right? :) Popsicle Molds on Amazon
Enjoy!
My favorites: Berry and Coconut Cream
Berry Popsicles
adapted from this lady
1 pint blueberries
3 Tbsp. agave or honey
1/2 100% fruit juice
squeeze of lemon juice
pinch salt
Dump all ingredients into your blender or food processor and blend to make a slurry. Pour into your popsicle mold and freeze 5 hours or until solid.
Limber de Coco (Coconut Cream Popsicles)
courtesy of Tasty Kitchen
7 oz coconut milk (1/2 the can)
6 oz evaporated milk (1/2 the can)1/4 c. sugar
1/2 c. shredded coconut, optional
1 tsp. vanilla
1/2 tsp. cinnamon
1 egg yolk
Whisk all ingredients and pour into your popsicle mold. Freeze 5 hours or until solid. (Yes, there's an egg in here. Crazy! The original recipe says you don't have to use it, but I figured, why not. I love raw cookie dough and egg nog; what's not to lose.)
Prosecco Popsicles
adapted from this lady
2 peaches, sliced
1 c. strawberries (I used frozen, whole strawberries)
3 Tbsp. sugar
1/2 bottle Prosecco (next time, I'll use Moscato)
Dump fruit, sugar, and a splash of Prosecco into your blender or food processor. Blend until you have a slurry. Stir in remaining Prosecco. Pour into your popsicle mold and freeze 5 hours, or until solid.
The Prosecco popsicles expanded the most. Note to self: When making popsicles with fizzy alcohol, don't fill the mold as high as usual.
Voila!
Posted by
Sara
at
8:03 AM
4
comments
Labels:
baking,
blueberries,
cookies,
dessert,
fruit,
ice cream,
kids in the kitchen,
peaches,
recipe,
sara,
strawberries
Friday, July 2, 2010
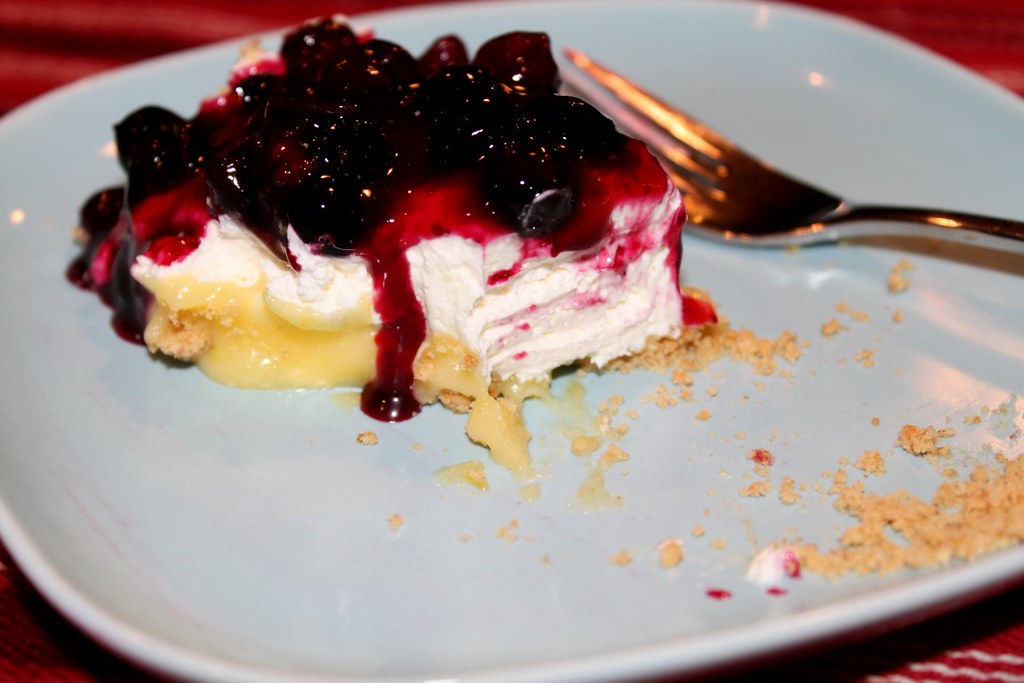
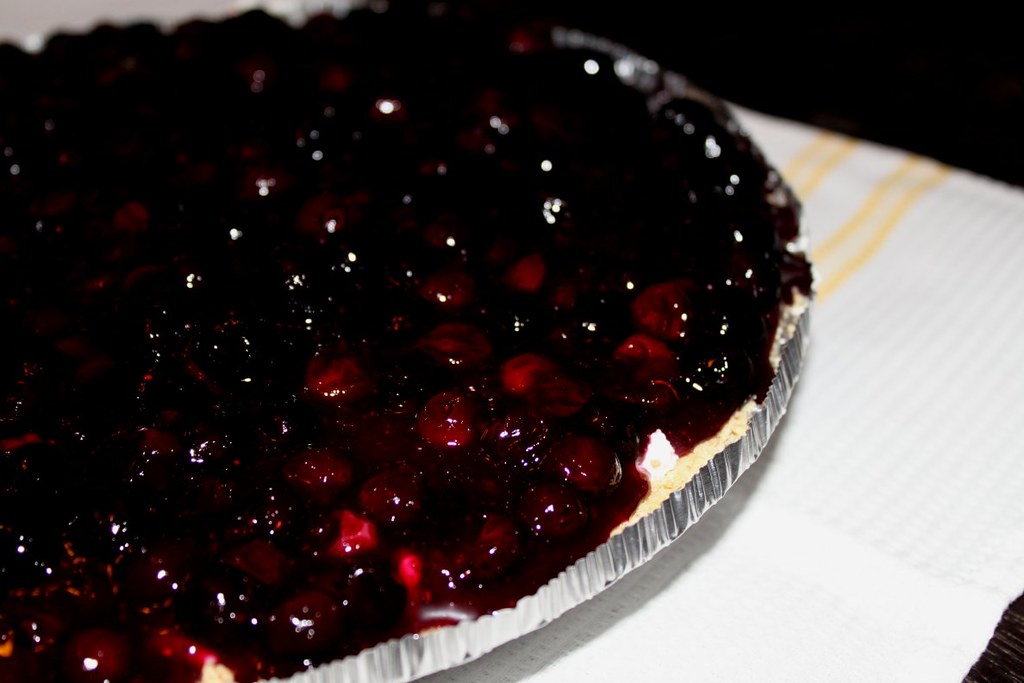
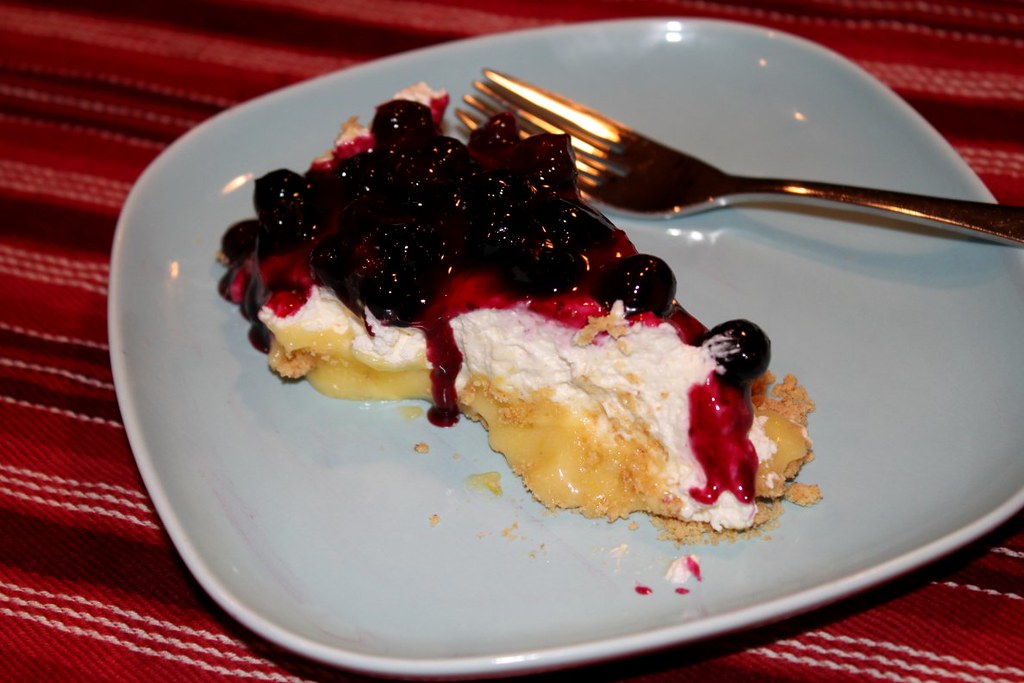
Creamy Lemony Blueberry Pie
Warning: Do not click-zoom this photo if you are hungry.
Happy 4th of July, everyone! I thought I'd post an easy dessert recipe that is perfect for summertime get-togethers. It's cold, creamy, and with a hint of lemon; heaven on a hot summer day.
We rate this recipe a Big 5 Spoons Up! Have a safe and fun weekend!
Enjoy!
Crust
1 large store-bought graham crust (the one that says it serves 10)
Lemon Curd
adapted from Joy of Baking
3 eggs
1/3 cup fresh lemon juice (not bottled)
3/4 c. sugar
1/2 Tbsp. lemon zest
4 Tbsp. unsalted butter, room temp, sliced into 4 pieces
In a saucepan over medium heat, whisk together eggs, sugar, and lemon juice. Whick constantly until mixture thickens and coats a spoon (and looks like hollandaise sauce). Remove from heat and whisk in lemon zest and butter, whisking until butter is completely melted. Pour into graham crust, cover with wax paper, and chill until cream cheese filling is ready. Lick the whisk and smile.
Blueberry Topping
adapted from Mom's recipe
1/2 c. sugar
1 1/2 Tbsp. cornstarch
2 1/2 c. blueberries (fresh or frozen)
1/4 c. water
Mix sugar and cornstarch in a saucepan. Gradually stir in and water and 2 cups of the blueberries. Cook over medium heat, stirring constantly, until mixture thickens and boils. Boil and stir for 1 minute. Remove from heat and stir in remaining 1/2 cup blueberries. Allow to cool while you make the cream cheese filling.
Cream Cheese Filling*
Mom's recipe
8 oz. cream cheese, room temp.
1/4 c. sour cream
1/2 c. sugar
1 tsp. vanilla
8 oz. Cool Whip, thawed
In a large bowl, with a mixer on medium speed, cream together cream cheese, sour cream, sugar, and vanilla. Mix in Cool Whip on low speed, scraping bowl often with a spatula.
* Note: You can use all lowfat and/or lowsugar ingredients for this portion. You just may need a bit more time in the refrigerator for it to set up. But it still tastes yummy, I can vouch for it.
Final Assembly:
Spread cream cheese mixture over chilled lemon curd layer. Top with cooled berries and refrigerate until ready to eat.
If you put a small strainer over your measuring cup, the seeds and pulp won't fall in.
The lemon curd will continue to thicken as it cools.
Wax paper keeps it from forming a "skin" on top.
Assembled!
Posted by
Sara
at
6:10 AM
4
comments
Labels:
blueberries,
cheesecake,
dessert,
fruit,
holiday,
recipe,
sara
Subscribe to:
Posts (Atom)