Sunday, February 28, 2010

What's on your Table

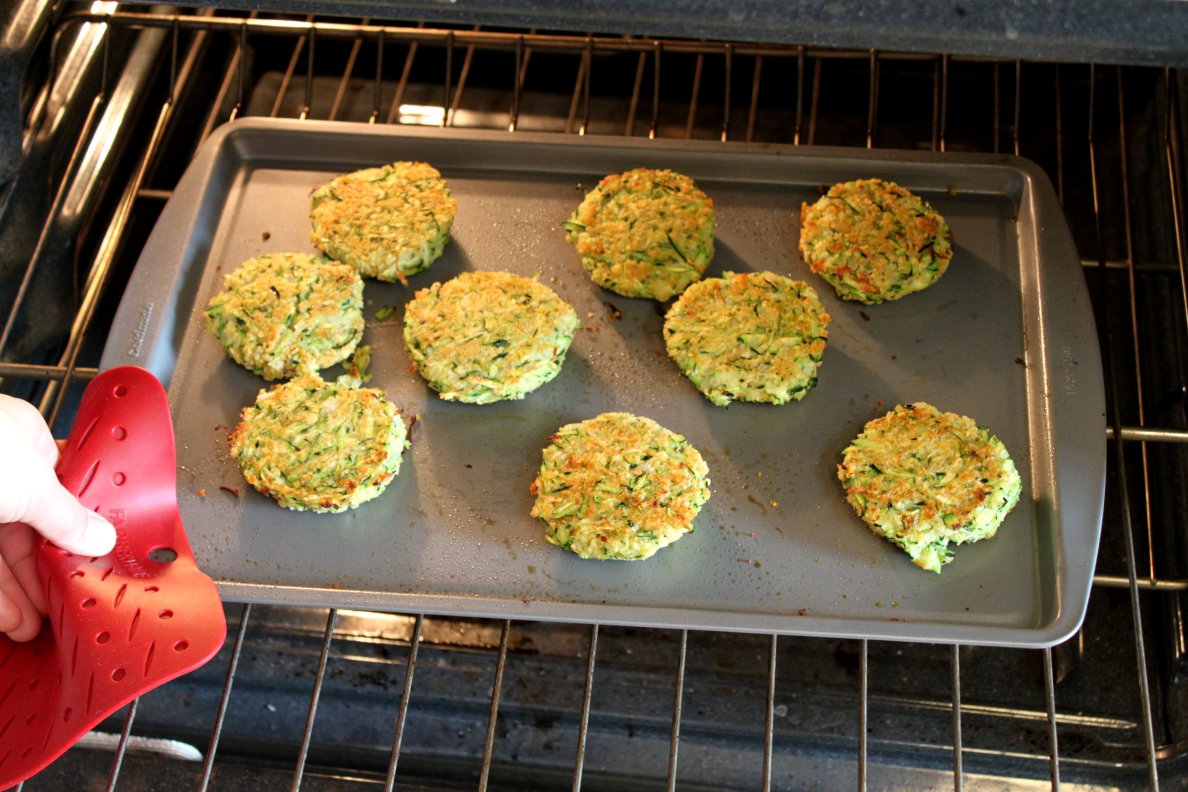
What have you made and loved lately... Share your newest or favorite recipes with us, so we can pick one and feature you next week!!!

This week comes from Frugal Living and Having fun for Arizona Skillet. I think it sounds wonderful! Thanks for linking up!

Frugal Recipe Box ~ Arizona Skillet

Photobucket
Here is a great recipe that is both Frugal in time and in money!! Enjoy

Arizona Skillet
(8 servings)

2 Tbsp. oil (Olive is best)
1 onion, chopped
1 green pepper, chopped
2 cloves garlic, minced
2 Tbsp. chili powder
1/2 tsp. ground cumin
1 can (16 oz. can) Kidney beans *Drained and Rinsed
1 pkg. (10 oz.) Frozen corn kernels
2 cans (14 1/2 or 16 oz. each) diced tomatoes *Including Juice
8 oz. Elbow macaroni *cooked and drained
Monterrey Jack Cheese, (Shredded)

In large skillet, heat oil over medium-high heat. Add onion, green pepper, garlic, chili powder and cumin. Cook 4 minutes or until vegetables are tender. Add Kidney beans, corn, and tomatoes with juice. Bring to a boil. Reduce heat and simmer, stirring occasionally *about 15 minutes. Toss with macaroni. Sprinkle Cheese to taste.

Money Saving Tip: When beans go on sale $ .50 or less, plan to buy a case of each type of beans you and your family enjoy eating. This will allow you to make very healthy meals at a moments notice. *As we say here at Frugal Living And Having Fun...."It's Better Than Fast Food"! You can always visit "Frugal Recipe Box here for your favorite recipes"

Saturday, February 27, 2010

Hawaiian Chicken Stir Fry

Two weeks ago I introduced you to one of my recipe staples, Hawaiian Chicken.  I decided I wanted to try something a little different with it and jazz it up a bit so I decided to attempt turning it into a stir fry.  It is simple, one dish cooking!

Ingredients:
3 chicken breasts cut up into bite size pieces
1 Tbsp oil
1 package stir fry veggies
1 bottle Honey BBQ sauce
1 can pineapple chunks in its own juice
2-3 packs of Ramen noodles (3 oz. each).  Discard season packet.

Directions:
Heat oil in pan.  Add chicken and cook approx. 5-6 minutes until chicken is no longer pink.

Photobucket

Add bag of stir fry veggies and cook until crisp tender.

Photobucket

Add 2-3 packs of ramen noodles, can of pineapple chunks with juice and BBQ sauce.  Stir well to mix together.  Cook a few more minutes until noodles become soft.

Photobucket

Serve and enjoy!

Photobucket

Rating:
The hubby gives is 4 spoons. 


Friday, February 26, 2010

Zucchini Cakes


Ha!  Tricked you!  You totally thought I was making something desserty, right?  This vegggie-based side is actually healthy!  These zucchini cakes borrow their seasoning and shape from crab cakes, but are given a healthy boost by the addition of a vegetable and by the subtraction of pan frying.  Serve them with a side of warm marinara or reduced calorie ranch dressing. 

I rate this recipe 5 Spoons because it's relatively low in calories and fat, and because it's a great alternative to my typical sauteed or broiled methods of cooking zucchini.  And they're pretty easy to whip up on a weeknight while you have your main dish baking in the oven or on the grill.

Enjoy!


Zucchini Cakes
makes 7-9 patties
2 medium zucchini
1/2 tsp. salt
1 c. panko crumbs
1 tsp. Old Bay seasoning
1/4 tsp. pepper
1 shallot, minced
1 Tbsp. butter, melted  (I opt for lower calorie spread)
1 egg, beaten

Preheat oven to 400 degrees and lightly grease a cookie sheet.  Shred zucchini with a cheese grater and place it into a colander.  Sprinkle salt over the zucchini and allow to sit for a few minutes to draw out the water.  Meanwhile, in a medium bowl, mix the panko, Old Bay seasoning, and pepper.  Squeeze water from the zucchini and add it to the bowl.  Stir in the egg, shallot, and melted butter until combined.  Scoop out with a 1/4 cup measure and shape into patties with your hands.  Arrange on the baking sheet and bake for 12 minutes each side.  Serve with warm marinara sauce.


The ingredient lineup:


Grate the zucchini into a colander.


Squeeze out the excess water.


Scoop out by 1/4 cupfulls.


And press firmly into patties.


Place on a greased cookie sheet.


Flip the patties halfway through baking.


Yummmmmmm!

Thursday, February 25, 2010

Baked Mac & Cheese

This dish can stand alone or be added as a side to your main dish. Either way, it's very tasty & everyone will give it 5 spoons!


The CEO's Baked Mac & Cheese

(photo compliments of allrecipes.com)

1 can Campbells condensed Cream of Cheddar Soup
1 8oz. package of shredded Cheddar Cheese
1/3 cup grated Parmesan Cheese
1 cup milk
1 can mini diced tomatoes
4 cups of cooked pasta (whatever shape you'd like!)
1/2 cup breadcrumbs
salt & pepper to taste


Boil Pasta according to package and set aside ~
Mix soup, cheeses, milk, & tomatoes in oven safe casserole dish ~
Stir in the pasta ~ Top with breadcrumbs ~
Bake at 400 degrees for 20 minutes or until bubbly
Enjoy!
(I switched to WordPress and most of my followers lost my feed -
Please visit my blog and re-subscribe to Life as a CEO - thanks!)

Wednesday, February 24, 2010

Teriyaki Beef -

Hubs and I went to Jamaica in the fall of 2008 and we ate at this restaurant that served us Teriyaki Beef, it was a huge success with my picky husband and he has been wanting it since we left.

So I found this recipe from THE FOOD NETWORK'S website and It was a HIT! I think next time I am going to try throwing in a TBS of brown sugar to make it a little sweeter.


Teriyaki Beef:
1 to 1 1/2 pounds roast beef, cut into thin slices-- We cut ours into like chicken tender chunks
Photobucket

Sauce:

  • 3/4 cup low sodium Soy Sauce
  • 1/4 cup water
  • 1 teaspoon freshly grated ginger
  • 1 teaspoon minced garlic
  • 2 to 3 tablespoons oil or butter


Mix together all sauce ingredients except the oil or butter.

Soak beef slices in sauce for at least 1 hour.

Photobucket

Fry in a saucepan in oil or butter for about 4 minutes per side, or until tender.

(We sort of boiled ours)


We made Rice in our handy Rice cooker to go with it! YUM

Photobucket


Also If you haven't ever seen or used Fresh Ginger, you can find it in your produce section and it looks like this

Photobucket

It has a wonderful fresh scent when you cut or chop it, and don't forget to peel it first. :)


We rated this recipe a 5 spooner...

**we also made a second batch at the same time for a FREEZER MEAL

Tuesday, February 23, 2010

Farmhouse Hash with Your Egg Choice

I sometimes wonder if I will ever get tired of the Food Network...while watching this week I caught a new show -- Sandra's Money Saving Meals w/ Sandra Lee. I always liked Semi-Homemade Cooking - so I sat down to watch -- what a terrific resource if you are trying to trim your grocery budget.

Not only did I take away several recipes...she gave lots of tips on how to save money in the grocery store and at home.

One tip that I already do: buy your veggies whole -- then clean and chop them yourselves...they are so much cheaper that way!

This is a recipe that was one of many that were featured on the show...and since it used ingredients that I already had on hand (everything except the Italian sausage) I thought that I would give it a try...You can find the full recipe here.

This was so simple and easy to prepare...it was a great way to have breakfast for dinner. I also loved that it was a one pot wonder...easier clean up!

In the original recipe she calls for a poached egg but since I don't like them (as in never tried them) I opted for a fried for the adults and scrambled for the kids.


Ingredients

1 tbl spoon canola oil (I used olive oil)
2 stalks celery diced
1 carrot diced
1/2 med yellow onion diced
2 large red potatoes diced ( I used 5-6 for my family)
1/2 lb sweet Italian sausage
1 tsp paprika
1 tsp chopped garlic
1/2 tsp red pepper flakes
salt and pepper to taste
eggs


1266894989.jpg picture by mellisarock

Notice from my picture that I left out the garlic, red pepper and paprika? I didn't do that on purpose...I was going by memory while cooking...should have checked out the recipe first...but even without the spices it was really good.


Directions:

Heat oil in a large skillet over medium heat. Add onions, carrots, celery, potatoes, sausage, paprika, garlic, red pepper flakes and salt/pepper to taste.

Saute stirring frequently, until the potatoes and carrots are tender, and the sausage is cooked through, about 12 minutes.

At this point Sandra and I took a different path -- so if you want to see the directions for poaching an egg -- click here.

I just fried a couple of eggs in butter and then scrambled 4 more with milk for the kids.

Divide the potato mixture between your bowls and top with eggs.


1266895077.jpg picture by mellisarock

Greg and I both thought that this was sooo yummy!! We both give it a rating of 5 spoons...we both wanted more but it was all gone!!

1266895108.jpg picture by mellisarock

The kids were a little bummed that they didn't get to have fried eggs...but I just didn't think that it was safe for them to eat.


Since I didn't get a chance to post the Mcklinky this past Sunday, I wanted to give everyone a chance to link up this week. Thanks so much for following along with us on this food adventure. We can't wait to see what's on your table!!


Mellisa

Monday, February 22, 2010

Blueberry Boy-Bait

I've noticed in the last couple of weeks that fresh fruit, except for bananas & oranges, are pretty pricey. So I've begun to dig into our reserves in the freezer to add fruit to our diets. We've been having smoothies almost every day! It's Sunday and my family will be gathering Around the "Honeymoon" Table for a pork roast dinner this afternoon. I wanted a delicious dessert, that wasn't pie. Blueberry Boy-Bait it is!
This recipe comes from the Yellow Farmhouse Cookbook.This recipe originally came from Renny Powell, a teenager from Chicago, who submitted this recipe in 1954 to the Pillsbury $100,000 Recipe & Baking Contest (now known as the Pillsbury Bake-Off Contest) and won second prize in the junior division.
Here's the line up:
2 cups flour
1 1/4 cups sugar
10 tablespoons (1 1/4 sticks) cold butter
2 teaspoons baking powder
1 teaspoon salt
2 eggs, separated
1 cup milk (I used skim)
1 1/2 cups fresh blueberries washed, drained & blotted dry
(I used frozen high bush blueberries)

Preheat your oven to 350 degrees. Grease a 9 X 13 pan (I used my butter wrappers) and then flour it lightly. Sift together the flour and sugar into a large mixing bowl. Cut the butter into pieces, then work into the flour mixture using your finger tips or a pastry blender. I started out with a pastry blender but then switched to my fingers and it went much faster. The flour should take on the texture of coarse meal, with a few pea-size pieces of butter still visible, and turn slightly yellow. Reserve 1/2 cup of the mixture to use as a topping.

Add the baking powder, the salt, the egg yolks (reserve the whites), and the milk to the flour mixture still in the bowl. Beat with an electric mixer on low speed for about 3 minutes. (This can also be done by hand with a wooden spoon. Which I did.)

In a separate bowl, whip the egg whites until they hold 2 inch peaks. You can use your electric mixer or as I did with a whisk. Fold gently into the batter. Spread the batter in the prepared pan. Sprinkle blueberries on top, then sprinkle with the reserved 1/2 cup crumb mixture. This is what it looked like just before I put it in the oven.
Bake for 40 - 50 minutes (I baked mine for 60 minutes) or until the center of the cake bounces back when pressed with the flat side of a fork. Let cool for 30 minutes before serving either as a coffee cake or a dessert.

With a house full of boys you just know we had to try Blueberry Boy-Bait! My 7 yr. old says he gives me 100 points. (?) My husband says it isn't a boring cake because there are 3 different textures. A bit of a crunch on the bottom, soft buttery cake, and moist blueberries on top. He says it's a "keeper". :) A keeper = 5 Spoons!
Blessings,

Saturday, February 20, 2010

Eggplant, tomato and cheese

Another super easy recipe!   This can be served as an appetizer, a side dish or pair it up with something else to turn it into the main course!  In the summer you can grow the 2 main ingredients in your own backyard.

Ingredients:
1 whole eggplant
tomatoes (fresh or canned)
Italian Seasoning
1-2 cups of Mozzerella cheese

Directions:
1.  Slice eggplant into "rings" and line baking dish with them
2.  Sprinkle with Italian Seasoning
3.  Cover with tomatoes
4.  Top with Mozzerella cheese

Photobucket


5.  Bake at 350 for 15-20 minutes
(15 min. gives the eggplant a softer texture, 20 minutes makes it a little firmer/crisper)
6. Cut up and enjoy!

Photobucket

 Ratings:
The hubby gives it a 3 1/2 spoons....his critique was to slice the eggplant thinner and to make it at the height of eggplant season and then it would be given higher spoons.

Friday, February 19, 2010

Pink Champagne Cake


Yes!  Today is our very own Mellisa's birthday!!  I thought I'd make her a virtual birthday cake so that we could all celebrate with her, hurrah!

Pink Champagne Cake doesn't have a clear origin or history, but it was popular in the 1950s.  I love champagne, and I love cake, so this recipe seemed like a no-brainer for me to try.  A pretty no-brainer at that.

I give the cake recipe 4 Spoons.  While I love the texture and the color, the hint of champagne flavor was a little too faint.  This cake would do best with a mild frosting so as not to overpower the delicate flavor.
Enjoy!


Pink Champagne Cake
courtesy of "Cuisine At Home", June 2009 issue
makes 2 9" cake rounds
2 1/2 c. cake flour, sifted
1 Tbsp. baking powder
1/2 tsp. salt
3/4 c. unsalted butter, softened (1 1/2 sticks)
2 c. sugar
3/4 c. brut champagne
1/4 c. milk
1 tsp. vanilla
6 drops red food coloring
6 egg whites

Preheat oven to 350 degrees.  Coat 2 9" round cake pans with nonstick spray.  Sift together flour, baking powder, and salt.  Set aside.

Cream butter and sugar with a mixer until light and fluffy, about 3 minutes.  Combine champagne, milk, and vanilla.  Add half of flour mixture to bowl and combine well.  Add half of the champagne mixture and combine.  Repeat.  Tint batter with the red food coloring.

Beat egg whites in a separate bowl with clean beaters until soft peaks form, about 2 minutes.  Fold egg whites into cake batter in thirds, stopping the stirring as soon as the whites are incorporated.  Dive batter between the 2 pans.

Bake about 30 minutes,  or until toothpick inserted has only 1 or 2 crumbs on it.  Cool cakes in pans for about 10 minutes, then turn out onto rack to finish cooling.

Frost with your favorite buttercream frosting or whipped cream.


Ingredient Lineup:


My favorite champagne.
Just enough raspberry to give it a little something, yet not
too sweet or overpowering.  And it's ten bucks a bottle.


The champagne and milk mixture will get foamy and look strange.


Soft peaks.

 
After the whites have been folded in, it looks kinda puffy and lumpy.


The cakes come out looking a little puffy too. 
But once they've cooled, the texture is perfect and moist.


Did I mention?  Tomorrow is my birthday, too  :)


Let's just look at that fork next to the cake slice there....
I have a terrible addiciton to making layer cakes in miniature.

Thursday, February 18, 2010

Creamy Broccoli & Cheese Soup

I have a thing for cheese. But I also have a thing for trying to lose weight. This recipe, while it may seem completely fattening, is really a tasty way to get that creamy fix--low calories and veggie servings to boot!

The CEO's Creamy Broccoli & Cheese Soup
{I can't take all of the credit here--
a friend of mine passed this recipe on to me!}


Ingredients:
1 box of frozen Broccoli Florets
1 lb. of Velvetta Cheese
1 carton of low-sodium Chicken Broth
1 can of Rotel Tomatoes


Microwave the Broccoli Florets for half of the time suggested on the box (you just want to thaw them out) - In a saucepan over medium heat, melt the cheese into the Chicken Broth until slightly boiling - Add the Broccoli Florets & Rotel tomatoes and simmer for 10 minutes

Even though I love the creaminess of this soup, I give it only 3 spoons. The Rotel tomatoes makes it very spicy. I love a little spice, but too much of it took away from the flavor of the cheese that I was craving. I would suggest either cutting the tomatoes with half Rotel and half plain mini-diced tomatoes, or just using a can of the mini-diced tomatoes instead.


Enjoy!!
~ Chrissy MacCEO

Wednesday, February 17, 2010

Candied Chicken

Recently I was sent a 30meals in one day kit. Which included the "dinner is ready" book By. Deanna Buxton, it has more than 150 Freezer-worthy dinner recipes.

This Candied Chicken recipe came from that book. It was AWESOME and We doubled the recipe and put one in the freezer after it cooled.
Photobucket


Ingredients:
2pounds boneless skinless Chicken breasts
1/2 tsp Salt
1/8 tsp Pepper
1 1/2 Cup Maple Syrup
3/4 Cup Apple Cider Vinegar
3/4 Cup Ketchup


Cut Chicken into strips,
Photobucket
Sprinkle Chicken with salt and pepper.


Place in a greased baking dish.
Photobucket
Bake 20 minutes at 350 degrees. Pour off liquid.


Combine Syrup, Vinegar and Ketchup.
Photobucket
Pour over chicken. Stir to Coat. Bake uncovered 45 minutes at 350 degrees.


Baste Chicken with sauce every 15 minutes.
Photobucket
*and pull them apart like I had to... to get more sauce per bite

Remove from oven and serve.


Notes:
  • If sauce is too thin, boil just the sauce on the stove top for a few minutes until the sauce thickens to your liking **we did this yum!**

Freezer Meal Notes:
  • This recipe may Also be frozen prior to baking. Bake Chicken for 20 minutes and pour off liquid. Place chicken and Sauce in freezer bag. Label and Freeze.
  • To serve Frozen dish: Thaw. Bake uncovered at 350 degrees for 1 hour, basting every 15minutes.


We loved this, and rated it a 5 spoon
AND
already ate our second set out of the freezer !


**If your interested in learning more about freezer meals, and want some great recipes including this one go to 30mealsinoneday.com and tell them Brandy sent you!**

Tuesday, February 16, 2010

Ham and Cheese in Puff Pastry

I hope that you are all enjoying the video's -- since I learned to cook by watching the Food Network -- It really puts me at ease to watch the recipe being created. I can then match up what I have created to see if I am doing something right. It's hard for me to just pick a recipe out of a magazine or cook book and make it. I do. But the video's really help me! I hope they are helping you too!


This week my recipe come from Ina Garten - The Barefoot Contessa. This is one of my favorite shows on the Food Network. I love how she makes fantastic dishes that seem hard but are secretly very simple.

In the video (from tasteofhome.com) you can see that there are very little in the way of ingredients:

Puff pastry
Ham
Cheese
Dijon mustard
and egg wash


I was have always feared working with puff pastry - it always seemed way to fancy for me. But it's actually very simple and easy to use. I was so surprised and delighted!! I am going to be looking for a dessert recipe to try out using it again! I bet it tastes phenomenal with chocolate!!


Check out how YUMMY mine looks!! I will say this -- every oven is different -- even though I took mine out well before the time was up -- it's still a little extra crunchy around the edges.


Photobucket


Directions:

Start with cold puff pastry on a lightly floured surface rolling out to about 10 in x 12 in.

Place on sheet pan lined with parchment paper. ( I didn't have parchment paper...turned out fine)

Brush with 2 tbs of Dijon mustard leaving a 1 in border.

Layer ham and cheese - about a quarter of a pound of each - leaving a 1 inch border. (I used cheddar cheese -- very yummy!!)

Roll out 2nd puff pastry to 10 in X 12 in.

Brush 1 in border of ham and cheese covered puff pastry with egg wash.

Place 2nd piece on top - lining up the edges to match.

Crimp edges with a fork.

Brush entire surface with egg wash.

Make 3 slits in top to allow steam to escape.

Bake in a preheated oven for 30 minutes at 425 degrees.

(remember to keep an eye on it -- mine got very brown very quick -- I covered it with foil and took it out of the over at about 22 minutes...ovens and cooking time certainly vary on this one!!)

Cut into squares and enjoy!!


Photobucket

We give this recipe 5 spoons -- I wanted more but it was all gone!

I think a good addition to this recipe could have been frozen spinach or broccoli - it was really cheesy and would have been great with either!


Photobucket


This was a simple and quick recipe to throw together. I hope that you enjoy it as much as we
did!!

Mellisa
Related Posts Plugin for WordPress, Blogger...