Showing posts with label dinner. Show all posts

Wednesday, June 15, 2011

Rosemary Ranch Chicken Kabobs


You'll never, ever guess where it's too hot to cook - still?!  Yep, it's still pretty near sweltering here, so I still have little interest in flipping on even one stove burner.  So, just like last week, I whipped up a new marinade and let Bo work his magic at the grill.  And, if I'm being honest?  This recipe is so, so, so good!!  The chicken turned out so juicy and flavorful; we'll absolutely be making this recipe a lot this summer.

Just like last week's recipe, this is very quick to throw together, and it cooks up quickly.  You could put the chicken and bell peppers into the sauce the night before or the morning of your dinner, and then get a finished dinner to the table in less than 30 minutes.

You could also make this a vegetarian recipe by swapping out the chicken for portobello mushrooms.  I cooked up a few mushrooms just to try it out, and I ended up loving the mushrooms most!

Enjoy!
Sara


Rosemary Ranch Chicken Kabobs
adapted from Allrecipes

1/4 c. olive oil
1/2 c. ranch dressing *
3 Tbsp. Worcestershire sauce
1 Tbsp. minced fresh rosemary
1/2 tsp. salt
1 tsp. lemon juice
1 tsp. white vinegar
1/4 tsp. ground black pepper
1 tsp. white sugar

2-3 boneless, skinless chicken breast halves
2 large bell peppers

In a medium bowl, stir together all the sauce ingredients. Let stand for 5 minutes, while you cut the chicken and bell pepper into 1 inch pieces. Place chicken and bell pepper in the bowl, and stir to coat with the marinade. Cover and refrigerate for 30 minutes, or up to overnight.

Preheat the grill for medium-high heat. Thread chicken onto skewers and discard marinade.  Lightly oil the grill grate. Grill skewers for 8 to 12 minutes, or until the chicken is no longer pink in the center, and the juices run clear.

* Note: You can definitely use bottled ranch dressing, but I make my own so that I can use almond milk and light mayo.  Either will work just fine.
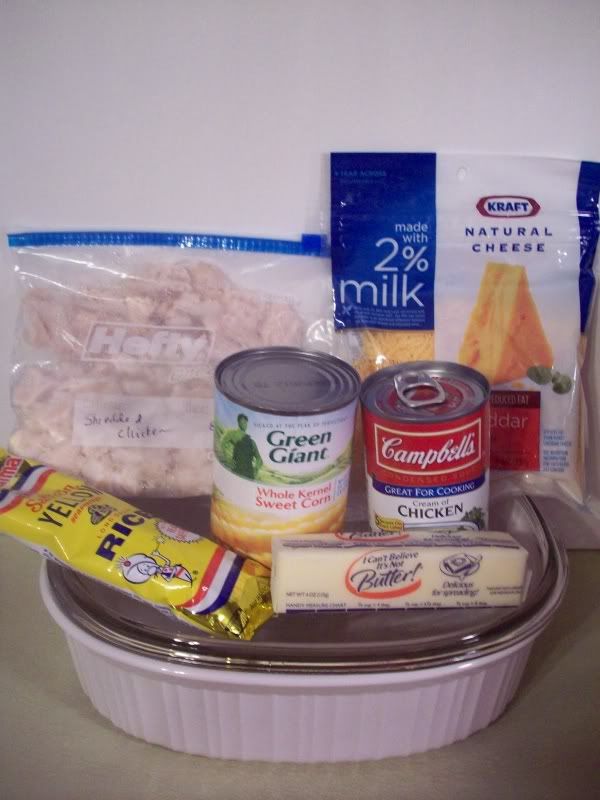
Ingredient Lineup:


Cover with plastic wrap and refrigerate for at least 30 minutes, up to overnight.


Grill 8-12 minutes, or until chicken is cooked through.


Wednesday, June 8, 2011

Carolina Style BBQ Chicken


Hi, there!  I don't know what the weather is like in your part of town, but it's hinting at sweltering here in big bad Atlanta.  And that means I'm not terribly interested in standing over a stove, let alone using our oven.  So, what better idea than to whisk up a sauce and send Bo out back to grill up some chicken? :)

We ended up loving this recipe just as much as the BBQ Chicken Thighs recipe I posted last July!  Carolina style sauces are mustard based, and while I wasn't loving on the sauce straight out of the bowl, it turned out so, so yummy on the chicken.  And it cooked up so juicy that we didn't even end up using the dipping sauce on the table.  Gotta love a recipe that cooks up in about 30 minutes and makes use of ingredients you probably already have on hand!

Enjoy!
Sara


Carolina-Style BBQ Chicken
adapted from Food Network Magazine

1/2 c. yellow mustard
1/4 c. apple cider vinegar
1/4 c. light brown sugar
1 1/2 Tbsp. mustard powder
2 tsp. hot sauce
1/2 tsp. Worcestershire sauce
2 Tbsp. unsalted butter, melted
salt and pepper, to taste
6-8 skinless chicken thighs, bone-in

Preheat grill to medium.

Whisk all ingredients except chicken in a medium bowl.  Reserve 1/4 cup of the sauce for dipping, on the table.  Set aside 1/2 of the remaining sauce for basting on the grill.  Place the chicken in a medium casserole dish or bowl and season with salt and pepper.  Pour remaining sauce over the chicken and toss to coat.  Let sit at room temperature for 10 minutes.

Brush the grill grates generously with vegetable oil.  Grill the chicken, covered, occasionally dunking each piece into the reserved basting sauce.  Grill until well marked and done, about 10-12 minutes per side.


Ingredient Lineup:


Divide the sauce:


Grill mark goodness!


Bookmark and Share

Friday, May 6, 2011

Asian Beef Skewers


We love this recipe!  I've had it in my trusty cookbook for years now, but because our grill was out of commission, I've mostly been preparing the recipe as My Favorite Stir Fry.  But!  We got ourselves a thrifty grill a couple weeks ago, and I've been plowing through all my favorite grilled recipes.

This one's really easy to throw together, and the cook time is only about 5 minutes - a fantastically quick dinner if you put it all together the night before.  We love grilled zucchini, so Bo also grilled up some slices and we had them for last night's dinner with steamed broccoli and jasmine rice.

Enjoy!
Sara


Asian Beef Skewers
3 Tbsp. hoisin sauce
3 Tbsp. sherry
¼ c. soy sauce
1 tsp. bbq sauce
2 cloves garlic, minced
1 Tbsp. minced fresh ginger or ginger paste
1 tsp. red chili garlic sauce, optional
1 ½ lbs. flank steak

In a small bowl, mix together hoisin sauce, sherry, soy sauce, bbq sauce, garlic, ginger, and optional red chili garlic sauce (aka chili paste).  Cut flank steak across grain on a diagonal into ¼“ slices. Place slices in a 1 gallon ziploc bag.  Pour marinade over slices, and mix well.  Refrigerate 2 hours, or overnight.

Preheat an outdoor grill for high heat. Discard marinade, and thread steak onto skewers.  Oil the grill grate. Grill skewers 3 minutes per side, or to desired doneness.  Makes 3 servings.


Ingredient Lineup.

Mix the marinade ingredients, then toss the meat in to coat.

Dump everything into a gallon-sized plastic bag and refrigerate.


Bookmark and Share

Thursday, December 30, 2010

Ground Turkey Larb

Larb:  a type of meat salad in Laotian and Thai cuisine, most often made with chicken, beef, duck, turkey, pork or even fish, flavored with fish sauce, lime juice and fresh herbs.

Note from Sara:  This week's recipe is the last of the uber-generous substitute cooks and is from my old roommate, Kye.  Now, Kye is the sole reason that I own and cook with oyster sauce, fish sauce, and hoisin.  She taught us a lot about Asian cooking when we all lived together, and her "Hmong Beans" is still my most favorite way of cooking fresh green beans (Serious Yum City, folks).  I was so excited that she sent me this recipe because 1) I already knew that it would taste amazing, 2) I'm mildly obsessed with lemongrass anything, and 3) Not one day after she emailed me this recipe, the foodie book I was reading started waxing poetic about Larb.  I was destined to try it out, don't you agree?  Thank you, Kye!!


Ground Turkey Larb
2 Tbsp. olive oil
1 half small onion, chopped finely
1 clove garlic, chopped finely
1 stick Lemon grass, cut finely
4 Hmong (Fresno/Thai) Chili
5 Crimini mushrooms, chopped finely
1 package of Lean Ground Turkey Breast (Usually 20 oz, can substitute or mix chicken and pork)


Sauce
3 limes, juiced
1 lemon, juiced
2 tsp. salt
1 Tbsp. Honey
1 Tbsp. fish sauce
1 tsp. hot chili ground
Finely chopped mint to taste

Directions:

Heat wok/large skillet to medium-high heat, add olive oil. Add finely chopped onions, garlic, lemon grass, hmong chilis, & mushrooms into the pan to sweat for 5 minutes. Add ground meat to the pan and break up meat to ensure small pieces. Cook for another 5 minutes until lightly browned. Add sauce of 3 limes, 1 lemon, salt, honey, fish sauce, and hot chili ground. Depending on how juicy the limes are, you may need 4, but use only three to begin with. Cook for another 3-5 minutes and you are finished.

Add finely chopped mint at the end after turning off the heat and stir. You can serve hot or at room temperature. Pair with rice, cabbage or lettuce cups.

Tips:

When chopping lemon grass, cut off the top of the stem and the bottom. Then take the outer layer of the lemon grass off. Make a cut vertically down the middle and finely chop horizontally.

Hmong chilies are generally found in the Mid West and in the Central Valley of California. You can use Thai chilis which are similar and can be found at any Asian market.

Hot Chili Ground- This is dried ground chilis mixed with garlic powder. You should be able to find this at the Asian market, but if you can’t, you can use red hot pepper flakes instead.

Mint- If you don’t like mint, you can substitute with Thai Basil that can be found at the Asian market or leave out completely.


Chopping the lemongrass:

The chopped crimini, onion, garlic, lemongrass, and chili:

Sauce ingredients:

The meat mixture, steaming hot:

 Adding the sauce:


Bookmark and Share

Thursday, November 4, 2010

Neatloaf


Note from Sara:  My side business gets pretty crazy during the holidays, so over the next several weeks, I'll be posting recipes from some amazing substitute bloggers.  This week, my friend John has generously stepped up to the plate.  He's one of my favorite writers ever (seriously), so definitely check out his blog!


Neatloaf: A Tasty Vegetarian, Gluten-Free Fake Meatloaf

You’re about to witness a groundbreaking moment here on the Blah to Ta-Daa blog. I’m humbled to not only be invited by Sara to cross post a tasty supper recipe, but also to be the first dude to volunteer in the history of the Blah to Ta-Daa blog. I am honored and quite excited.

As yet another short preface, please don’t be scared of this recipe because it’s vegetarian or the name sounds funny. Sadly there’s no other way to describe it other than “fake meatloaf”. If you give it a chance you might really enjoy it.

Short backstory: One of my favorite places to eat in San Diego was Jyoti-Bihanga, a tasty vegetarian/vegan restaurant run by the Sri Chinmoy folks. If you aren’t familiar with them, I’ll tell you this - they make a fantastic fake meatloaf, they call it Neatloaf. You can imagine how excited I was when a friend of mine e-mailed me the recipe, so now I can have delicious Neatloaf in the comfort of my own home here in North Dakota.

Since I cook for a Celiac sufferer, I make the recipe gluten free by simply replacing the Special K with gluten free corn flakes or one of the gluten free Chex varieties that are on the market. This can change the consistency a little bit, but keeps the recipe well within the realm of deliciousness.

Cheers!
John,
at Deaf Dogs and Benevolent Gnomes


Here are the ingredients for the Neatloaf:
4 large eggs
1/4 cup Lipton Onion Soup Mix
1/3 lb low-fat ricotta cheese
1/3 lb firm tofu (squished up into small pieces)
1/4 cup vegetable oil, of choice
1/3 cup onion, chopped
1/2 cup cooked brown rice
1/2 teaspoon oregano
1/2 teaspoon basil
1/4 teaspoon rosemary
4 cups Special K cereal (substitute GF corn flakes or Chex to make gluten free)
1 1/2 tablespoons garlic

Here are the ingredients for the sauce:
1/2 cup ketchup (you can also substitute catsup)
1/8 cup Dijon mustard
1/4 cup molasses
1/8 cup apple cider vinegar
Cayenne pepper (to taste - a pinch is plenty for me)

Directions:
  1. Heat oven to 300°F.
  2. Saute the onions and garlic (in just a little bit of oil).
  3. Beat eggs in bowl, the mix together all ingredients except Special K.
  4. Mix well, and add Special K last.
  5. Turn into a 9 x9 baking pan sprayed with cooking oil. 
  6. Bake 1 hour.
  7. While Neatloaf cooks prepare sauce, whisking together all sauce ingredients in a bowl. I typically like a lot of sauce so I double the sauce part. 
  8. Remove loaf from oven, pour sauce over the loaf and cook an additional 10 minutes.
  9. When loaf is done, if you can avoid the temptation, it’s best to let it sit for 10-15 minutes.
  10. Best served with mashed potatoes and gravy and a side veggie.

It’s a bit of a complicated recipe, but don’t get scared, it’s not hard.  I usually double the recipe and use two loaf pans – one is for dinner that night and leftovers, the other one goes in the freezer for super easy dinner down the road.  If you do freeze a loaf pan, cover with aluminum foil and reheat in the oven.  The leftovers also freeze really well and make delicious lunches, definitely a highlight in the household. 
 
Note from Sara:  This is not John.
This is Alycia, his lovely girlfriend, and one of my best good friends.

Bookmark and Share

Thursday, October 7, 2010

Baked Coconut Shrimp


I'm so utterly pooped this week that I had no idea what I was going to make for you.  So, while I stood in the grocery store, trying to decide which ingredients might need to hop into my cart, an email from Allrecipes came through on my phone, showcasing this recipe.  Hmmmm.... The only ingredient I didn't have was shrimp, and they happened to be on sale.  Perfect!

What I love about these buggers is that they're not fried.  They're rich and flavorful, and would make the perfect snack or party food.  We tried them dipped in all kinds of sauces in our fridge, but our big favorite was just a mix of equal parts honey and dijon mustard (sound familiar??).  Bo love love loves these, and thanked me no fewer than 6 times during dinner.  I thought they were rich and definitely filling.  I might bust this recipe out again the next time we have people over for snacks.

Enjoy!


Baked Coconut Shrimp
adapted from Allrecipes.com

1lb large shrimp, peeled and deveined
1/3 c. cornstarch (yes, 1/3 cup)
1 tsp. cayenne pepper
1 tsp. Old Bay Garlic & Herb seasoning
2 c. flaked sweetened coconut
3 egg whites, beaten until foamy

Preheat oven to 400 degrees and lightly coat a baking sheet with cooking spray.

Rinse and pat-dry shrimp with paper towels.  Mix cornstarch, cayenne, and Old Bay in a shallow bowl.  Pour coconut into a separate shallow bowl.  Working with one shrimp at a time, dredge it in the cornstarch mixture, dip it in the egg whites, and then lightly dredge it in the coconut.  Place on the prepared baking sheet and repeat with remaining shrimp.  Bake 15-20 minutes until coconut is golden and shrimp are done, flipping over (carefully) halfway through baking.

It's easiest if you use 2 hands -
one for the cornstarch (dry) and one for the egg whites and coconut (wet).


Try to just lightly coat the shrimp with coconut.
The first time I made these, I coated them so thick that you couldn't 
see the shrimp for the coconut.  They were way, way too coconutty.


Zoomed in shrimpyness.


Bookmark and Share

Friday, October 1, 2010

Honey Mustard Chicken


I dug my trusty cookbook back open for this week's recipe.  I hate to be a whining, broken record, but my schedule just keeps getting crazier (and the definition of insanity is..?  yes.)  So, I whipped up an old standby for today; I've had this recipe for so long, that I can't even remember where I got it from.  Oh well.  The only thing that's really important is that this thing is dang easy.  It uses ingredients that I nearly always have on hand, and once you throw it in the oven, it pretty much just babysits itself for 30 minutes.  Easy peasy, and we love it!!


Enjoy!


Honey-Mustard Chicken


2 ½ lbs skinless, bone-in chicken thighs (6-8 thighs)
1/3c. Dijon mustard
1/3c. honey
3Tbsp. chopped fresh dill or 1 Tbsp. dried dill 

Preheat oven to 400o and line a casserole dish with foil.  Combine mustard, honey, and dill in small bowl.    Dunk each chicken thigh into the honey mustard and then place into the prepared pan.  Repeat with remaining chicken pieces, coating well. Pour remaining honey mustard over the chicken.  Bake, on the center rack of your oven, until done, about 30 minutes.  Tip:  To keep the chicken nice and moist, flip the chicken thighs over once halfway through cooking


Ingredient Lineup:


Coated chicken, ready for the oven:


Done, done, done, done, doooooone!


Bookmark and Share

Wednesday, September 22, 2010

Cheesy Chicken & Corn Casserole

**Brandy aka The Royal Family asked me (the other Brandy) to guest post because her entire family has been hit with the sickies. I wish them a quick recovery & hope that you like my dish!

Recently I stumbled across a site by the name of Southern Plate and then proceeded to spend hours reading through the recipes & family antidotes. Warning: If you are trying to lose weight do NOT go to this blog. It is full of comfort food. Down home, simple, delicious, comfort food like the Cheesy Chicken & Corn Casserole I made last night.

Oh my.

Everything you need should already be in your kitchen because again these are simple recipes. Not like that crazy stuff that Top Chef contestants come up with, but real food that real people (like me) can make and enjoy.


You'll need:

1 box/packet of saffron rice (or Zatarain's as SP uses)
1 1/2 - 2 cups cooked chicken, diced/shredded
1 can cream of chicken soup
1 can corn, drained
2 cups cheddar cheese
2 Tbsp butter (see note)

Cook rice according to directions. Reserving 1/2 cup of cheese, mix everything else together including the cooked rice. (That means only 1 1/2 cups goes in now for the directionally challenged.)


After it's well mixed, put the remaining cheese on top. Bake in a 350 degree oven for 30 minutes or until everything is nice and bubbly.


Note:
-SP's original recipe called for a WHOLE stick of butter. I thought uh, no, and used 1/2 stick. Even that could be cut back without affecting the recipe I think. Next time I may even omit the butter all together.

-You'll notice that I just mixed everything up in my casserole dish. I mean why dirty a bowl for nothing right?

-As displayed by the previous statement I am lazy so I typically cook & freeze chopped chicken and ground hamburger. That way I only make one mess but I have cooked meat ready for me whenever I need it. Obviously if you don't do that you will have the extra step of cooking and chopping your chicken.


It may not be the prettiest dish to hit our plates but this casserole was delicious. We give it 5 spoons!


Friday, September 17, 2010

Easy, Amazing Roast Chicken


Remember that simple and delicious tomato sauce I posted a couple of weeks ago?  This recipe is by the same lady.  (Sidenote: I'm pretty sure that I'll have to name my first-born "Marcella.")  Like that recipe, this one uses only a few ingredients and is very, very simple to put together.

And it's Holy Dear Goodness Amazing.  I'm telling you, this is yummmmm.  The chicken itself turns out moist, and the meat was falling off the drumsticks.  And that broth hiding up there in the photo?  I nearly slurped it up with a spoon.  That's no lie.  I kept dipping my white meat into it.  I also saved the leftover broth to make into a gravy tomorrow night, and I'm pretty sure that it, too, will make me fall on the floor in bliss.

5 spoons?  We vote this a 10.

Enjoy!


Marcella Hazan's Roast Chicken with Two Lemons
adapted from these detailed instructions

3-4lb whole fryer chicken
2 small lemons
salt
pepper
optional:  1/2 c. Saucy Mama Sweet Onion Marinade

Preheat oven to 350 degrees.

Wash the chicken thoroughly in cold water, both inside and out.  Remove all the bits of fat that are hanging loose.  Let the bird sit for about 10 minutes, tilted, to allow all the water to drain out.  Pat dry with paper towels.

If you're using the marinade, spread it under the chicken skin, to coat entire chicken.

Sprinkle a generous amount of salt and pepper over the entire bird, rubbing it with your fingers over the body and into the cavity.

Wash the lemons and dry them with a paper towel.  Soften each lemon by rolling it on the counter while pressing down on it with your palm.  Poke the lemons 10 times each with a fork.  Put the lemons inside the chicken cavity, and close up the opening by securing the skin with toothpicks. 

Put the chicken in a roasting pan, breast side down (no oil or greasing necessary).  Place it on the middle rack of your preheated oven and cook for 30 minutes.  Then, flip the chicken over so the breast is facing up.  Cook for another 30 minutes, and then turn the oven temp to 400 degrees.  Cook for another 20 minutes, or until internal temp reaches 165 degrees.

Remove chicken from the oven and allow it to rest in the pan for 10 minutes.  Then cut it up and eat it up!  Make sure you spoon some of the broth in the bottom of the pan, it's beyond amazing.


Ingredient Lineup:


If you're opting to use the Saucy Mama marinade,
first separate the skin from the meat, using your fingers.
Do this all over the entire bird.


And then push the marinade between the skin and the meat.


Put the small lemons into the cavity of the chicken.

And then suture up the opening with toothpicks.


After.  :)


Bookmark and Share
   
Related Posts Plugin for WordPress, Blogger...