Showing posts with label snack. Show all posts

Wednesday, December 12, 2012

Chex Party Mix


Knock, knock!  I'm finally back!

I'm this-close to being finished with my chores-y Christmas tasks, and this-close to a whirlwind of baking treats and making candies.  Hurrahhhh!!  I decided to start with my Gramma's Chex mix recipe because it was a speedy-quick one to throw together last night.  Plus, I hadn't made it in at least seven years, so it was high time I revisit this munchy snack.

Monday, June 11, 2012

Lime & Salt Popcorn


Know what they say about the best laid plans?  Exactly.

I had planned to make granitas yesterday, but instead of 90+ degree sunshine, we got cool and glorious rain.  Couple that with a free HBO weekend, and my Sunday suddenly became all about movies on the couch.  And what better snack than some jazzed up popcorn?

Monday, April 23, 2012

Make it From Scratch: Lara Bars


Chocolate Craving Bars

'Morning!

You might remember that last month, Katie from Living Crunchy guest posted here with instructions for homemade, natural Easter Egg Dye.  It's my turn to return the favor, so I set out to find a recipe for homemade Lara bars.  

Monday, April 16, 2012

Coconut Pecan Granola


Good Morning!  Today, I semi-cheated and had a small bowl of this granola with almond milk before blending up my regular green smoothie (today's has frozen cherries - yum!).  And, I'm still as much in love with this granola as I was yesterday when finalized my recipe changes.

Tuesday, March 20, 2012

Broiled Grapefruit


God bless Pinterest.  


I was feeling extraordinarily guilty for not having any recipes to post this week, and then the latest viral recipe on Pinterest popped into my head.

And whyyyy didn't I get any recipes blogged up this weekend?  Why?  It wasn't for lack of cooking.  I tried out four brand new recipes this last weekend, and came up with some yummy things to share!  But.  But, it was 85 degrees outside.  Normally, I'm incapable of sitting and doing nothing, but that's exactly what I did out in our back yard both Saturday and Sunday.  So I wasn't in the kitchen during prime daylight photo-taking hours.  And I don't even have a tan to show for it :)

Wednesday, March 7, 2012

Microwave Potato Chips


I told you it wouldn't be green! :)

I'd been staring at the directions for microwaved potato chips for a good year before I finally got around to trying it.  Silly, silly me!

Ingredient lineup, whatever! - these only call for potatoes and salt.  Period.  Nothing else.  You can get all crazy and whip out your favorite seasoning salt, but you truly don't need any other ingredient.  Which means, zero oil.  It's bonkers, I know.  You wouldn't think that the microwave could get potato slices crunchy, but it absolutely does.  These chips end up with a texture like kettle chips - a little on the heartier side with a good crispy crunch.

Wednesday, February 1, 2012

Food Rule 78 and Fruit Salsa and Cinnamon Chips


Yum Yum Yum Yum Yum Yummmmmm!  Is it obvious how much I love this recipe?

As I've mentioned in the past (here and here), I really struggle with getting more fruit into my diet.  Veggies?  Delicious!  Fruit?  Not so much.  So anytime I find a way to eat fruit that has me reaching for seconds and gobbling up leftovers, it's a definite keeper.  Something about these tiny pieces of mixed fruit with a touch of apricot preserves leaves me feeling so happy.  And those baked cinnamon chips aren't anything to shake a stick at either.  I'm so excited to make this recipe on Sunday for the Super Bowl party we're hosting!


Healthy and delicious and perfect for sharing - talk about a triple threat recipe!

Please Don't Ask Me Which Teams Are Playing,
Sara


         Pin It


Fruit Salsa and Cinnamon Chips
adapted from Allrecipes


2 kiwis
2 apples, peeled and cored
8 oz. peaches (frozen & thawed work perfectly)
1 lb. strawberries
3 Tbsp. all-fruit preserves (apricot flavor is fantastic)

10, 10" flour tortillas
butter flavored cooking spray
1/4 c. cinnamon sugar mixture (1/4 c. sugar + 1 Tbsp. cinnamon)

Finely dice all fruit and toss together in a large bowl.  Stir in fruit preserves and chill in the refrigerator while you prepare the cinnamon chips.

Preheat oven to 350 degrees.

Coat one side of each flour tortilla with butter flavored cooking spray and sprinkle with desired amount of cinnamon sugar. Flip tortilla over and repeat for other side.  Using a pizza cutter, cut tortilla into wedges and arrange in a single layer on a large baking sheet. Bake in the preheated oven 8 to 10 minutes. Repeat with any remaining tortilla wedges. Tortilla chips will continue to crisp up as they cool.  Serve with chilled fruit mixture.  Makes 8 servings.


         Print Friendly and PDF

Fruit Salsa Ingredient Lineup:


Cinnamon Chips Ingredient Lineup:


Thursday, January 12, 2012

Food Rule 45 and Crispy Sweet Potato Fries


This has got to be my one of favorite rules in the entire book:


Uh, hello!  I love to cook, and who doesn't love to indulge in fatty, salty, or sweet foods?  This is pretty much a done deal for me!

This recipe for Sweet Potato Fries deviates from your standard slice-em-and-bake-em recipe in that it turns out Crispy.  Giving the sweet potato sticks a light coating of corn starch allows them to bake up with a barely-there coating (similar to the way that our Baked Coconut Shrimp crisp up).  And, there are definitely no deep fryers involved here!  Go on, and zoom in on a photo or two, if it's not too early to be scoping out french fries.  No steamy, slimy outer layers in sight!  Just a slight crisp without a greasy mess.

Ok, so I didn't go full blown junky junk food on you with this recipe (I honestly can't bring myself to deep fry anything at home), but these are still very much in the delicious category.  As I was editing the photos last night, Bo commented, "Yeah, those were good." 

We ate them dipped in a spicy mayo: About 1/2 cup mayo mixed with a teaspoon of chili sauce, 1/4 tsp. cayenne, and a pinch of salt.  Feel free to change up the amounts to your liking.  I just threw things into a bowl and tasted as I went.

Enjoy!
Sara


         Pin It

Crispy Sweet Potato Fries
adapted from The Art of Doing Stuff

1 large sweet potato
1/3 c. corn starch
seasoning salt
2 Tbsp. canola oil

Cut the sweet potato into even sticks.  (No need to peel the potato first, because you can trim the skin as you cut the potato into sticks).  Soak the sticks in water for an hour or more.  Drain the potato sticks, but do not blot dry.

Preheat oven to 425 degrees.  Place a baking rack onto a cookie sheet and lightly spray the rack with oil.  (Note: You can skip the rack and just use a cookie sheet, but you'll need to flip the fries over midway through cooking in order to get all sides crisped.)

Working in batches, add a tablespoon of corn starch and a shake of seasoning salt to a plastic bag.    Add in a small handful of sweet potato sticks (about 6 or 7) and close the top of the bag, making sure there is air inside to create a balloon shape.  Shake the bag to completely coat the sweet potato sticks.  Remove the sweet potatoes, shaking the excess corn starch off, and set aside.  After all sticks have been lightly coated with corn starch, drizzle oil over all the sticks and use your hands to make sure the sticks have a light coating and then place onto prepared baking rack.

Bake for 20 minutes, or until sweet potato sticks are fork-tender.  Increase oven temperature to Low Broil and continue baking for a few more minutes, until fries begin to crisp.  Makes 2 servings.


         Print Friendly and PDF


Ingredient Lineup:


Tuesday, January 3, 2012

Food Rule 5, No Sugar Oat Cookies, and a Giveaway!


(Giveaway details at the bottom of this post)

Good mooooooorning!

So.  After yesterday's chatter about these mysterious and vague "Food Rules," I bet you're ready for something to sink your teeth into - both literally and figuratively.  Behold!  Our first Food Rule:


Over the past few months, I've been trying to eliminate excess sugar from my diet.  And that includes the Splenda I once loved with all my heart.  I've been reading too many scary things about artificial sweeteners, and if it's such a hotly debated topic in the nutrition world, I really ought not to be eating it.  But, I can't bear the thought of using real sugar and adding all those calories back into my diet.  So I did the one thing that seemed to make the most sense: I started teaching my taste buds to be ok with foods that are less sweet.  Yep.  The same way I taught my taste buds to be ok with vegetables (and then like them and then crave them and then actually love them way more than the other things on my dinner plate).  I started with ditching the sugar in my morning coffee.  Then I started digging through my pantry to see if sweeteners were sneaking onto the labels in my other foods.  Did you know that a lot of canned soups have sugar?  And that whole/real/natural fruit popsicles have sugar, fructose, and corn syrup at the top of their ingredient lists?!  It's crazy town!

After really sticking to it (I'm a baker after all, and my favorite food is cake with frosting!), I discovered some things about sugar: When I don't eat it, I'm a lot nicer.  Like, a lot nicer.  And my skin looks better.  And I don't find myself filled with an overwhelming urge to cram forkfuls of dessert into my face, like before.  I'm not doing some crazy diet or counting carbs or using a new-fangled substitute.  I'm teaching my taste buds to like foods that aren't dialed up to Holy Sugary Sweet Explosion.

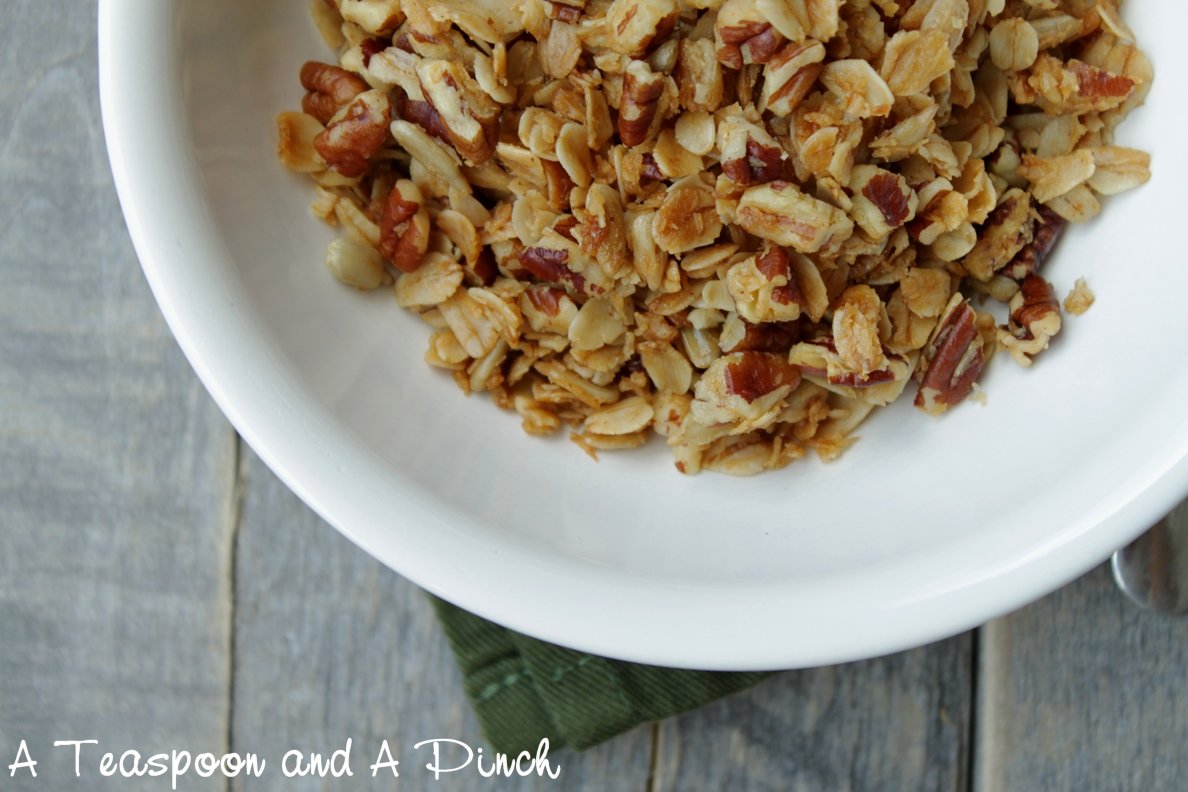
Today's cookie recipe definitely fits the bill!  I mean, it's got "No Sugar" straight up in the title, even.  And if you look at the ingredient list, there is also no dairy, no gluten, and only a scant amount of added fat.  The cookies bake up similar to a chewy bar, and I really, truly love them.  When Bo first took a bite, he was expecting a sugary blast similar to my regular cookie recipes.  But after I told him, "Dude, there's only fruit sugar in those things and almost zero fat," he paused to consider them and then promptly ate 4 cookies before I could yell at him to save some for me.  I love that these cookies have an ingredient list I feel zero guilt about, and they're a perfect little snack to keep the tummy grumblies at bay.

Enjoy!
Sara

p.s.  Don't forget to enter the giveaway!  Details at the very bottom of this post!


         Pin It


No Sugar Oat Cookies
adapted from Blueberry Girl

1 1/2 c. (128g) regular rolled oats
1 c. (60g) unsweetened coconut flakes
1/4 c. (30g) almond meal
1/2 c. (60g) nuts, finely chopped
1 tsp. cinnamon
1/2 tsp. salt
1 c. (60g) dried fruit (I used blueberries and raisins)
4 (425g total) ripe bananas, mashed
1/4 c. canola oil
1 tsp. vanilla

Preheat oven to 350 degrees.  Line a baking sheet with parchment paper.

In a large bowl, stir together oats, coconut flakes, almond meal, nuts, cinnamon, and salt.  Stir in dried fruit, making sure that the pieces do not stick together.

In a separate medium bowl, combine mashed bananas, oil, and vanilla.  Pour wet ingredients into the bowl with the dry ingredients and stir until well combined.

Press batter into cookie cutters and space 1" apart onto parchment paper.  (Or use a cookie scoop and flatten the balls to make them evenly thick.)  Bake for 20 minutes, or until edges and bottoms are golden brown.  Store in airtight container.  Makes about 20 cookies.


        Print Friendly and PDF


Ingredient Lineup:


GIVEAWAY!

To celebrate kicking off this Food Rules series, I'm sponsoring a giveaway!

What the winner will get:

- A copy of Michael Pollan's newly illustrated "Food Rules: An Eater's Manual"


- 2 bottles of my homemade vanilla extract


- 1 "Cookies for Kids Cancer" cookie spatula


There are three different ways you can enter.  That means that each person can enter up to 3 times!

1.  Post a comment here telling me one area in your food world where you're thinking of cutting back on sugar or sweeteners.  (Or post a comment telling me that cutting sweeteners is for the birds and that you really just want the pretty book, the pretty vanilla, and the pretty spatula.)

2.  Post a link to this recipe on Facebook and come back here to leave a comment telling me you did that.

3.  Post a link to this recipe on Pinterest and come back here to leave a comment telling me you did that.
     (If you need a Pinterest invite, email me: skeddy @ gmail .com)
     Pin It


Drawing will take place this Friday, 1/6 at noon EST.  And I'll email the winner right away!


Fine print: Giveaway open to US shipping addresses only, so if you live somewhere else, you'll need to regift these prizes to a best pal living in the US.  This giveaway isn't sponsored by anyone or any company.  It's all out of my pocket and, as my Dad used to say - the goodness of my pea pickin' little heart.

Wednesday, October 12, 2011

Halloween Idea: Apple Monster Mouths


I thought these apple treats were too fun - and too easy - to pass up!  In a sea of candy and sugar-laden Halloween treats, these are a great little healthy option.  And they'd be super quick to throw together for an after school snack!

If you'll be making these ahead of time or for a party, you can first soak the notched apple pieces in a bowl of water with a couple tablespoons of lemon or orange juice.  Then continue decorating with peanut butter and almond pieces as directed.

Enjoy!
Sara


Apple Monster Mouths
idea adapted from Cute Food for Kids

Apples
Almond slices or slivers
Peanut butter
Toothpicks
Mini marshmallows

Core an apple and then cut it into 1/4ths.  Using a small knife, cut a notched section from each apple piece.  Spread the open notch with peanut butter and then press in the almond slices for teeth.  Dot an eyeball onto mini marshmallows using food markers or chocolate syrup.  Poke a toothpick into each marshmallow eyeball and then poke into the top of each apple piece.


Core an apple and then slice it into quarters.


Using a small knife, cut a notch into the side of an apple piece.
And then cut another notch perpendicular to the first notch.
Remove the cut out section and turn apple piece on its side.


Tip:  If your apple slices don't want to stay upright, poke the eyeball toothpicks
all the way through the apple to prop up the slice from the back.


Print Friendly and PDF    Pin It
Related Posts Plugin for WordPress, Blogger...